


How to Activate an eSIM on iPhone: Complete Step-by-Step Guide (2026)


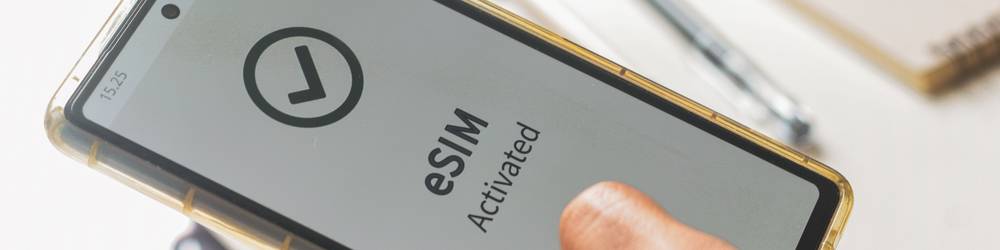
Staying connected abroad used to mean hunting for a local SIM card the moment you landed. Today, an eSIM lets you switch to a travel data plan before your flight even touches down — no physical card, no queue at the airport kiosk, no risk of losing your home SIM in the process. If you have a recent iPhone and a few spare minutes, activating an eSIM is straightforward once you know exactly where to look in iOS. Book your flights first, then set up your eSIM before departure — both can be sorted from a single app.
What Is an eSIM and Why Should Travellers Use It?
An eSIM — short for embedded SIM — is a programmable chip built directly into your iPhone's motherboard. Unlike a traditional nano-SIM card that you physically insert and remove, an eSIM is activated entirely over the internet by downloading a carrier profile. Once active, it works exactly like a physical SIM: calls, texts, and mobile data all flow through it normally.
For travellers, the advantages are significant. You can purchase a local data plan from your destination country days before you leave, activate it at home while you still have reliable Wi-Fi, and arrive abroad with data working from the first moment you step off the plane. You also keep your home SIM active at the same time, so you never miss a call from the bank or a family member while you are away. Dual-SIM capability — running your home number and a travel data plan simultaneously — is perhaps the single biggest reason frequent travellers are switching to eSIM.
Which iPhones Support eSIM?
Apple introduced eSIM support with the iPhone XS, iPhone XS Max, and iPhone XR in 2018. Every mainstream iPhone model released since then also supports eSIM. The complete list of eSIM-compatible iPhones includes the full iPhone 11, 12, 13, 14, 15, 16, and 17 series, as well as the iPhone SE (2nd generation, 2020) and newer SE models.
A few important regional notes apply. iPhones purchased in mainland China, Hong Kong, and Macao do not support eSIM — those models rely on dual physical nano-SIM trays instead. Starting with the iPhone 14, Apple removed the physical SIM card tray entirely from models sold in the United States, making those devices eSIM-only. If you own an iPhone 13 or newer, your device can hold multiple eSIM profiles in storage and run two eSIMs as active lines simultaneously.
Before You Activate: What You Need
A compatible, carrier-unlocked iPhone
Go to Settings → General → About and scroll to Carrier Lock. You need to see "No SIM restrictions" displayed. If your device is locked to your home carrier, contact that carrier to unlock it before proceeding — most carriers unlock devices once the original contract period is complete or the device is fully paid off.
A stable Wi-Fi connection
eSIM activation downloads a carrier profile over the internet, so a reliable Wi-Fi connection is essential throughout the process. Do not attempt activation on a slow or unstable connection — if the download is interrupted partway through, the profile may fail and you will need to contact your eSIM provider for a replacement code. Home broadband or a hotel Wi-Fi connection both work well.
Your eSIM QR code or activation details
When you purchase a travel eSIM — for example through Traveloka's eSIM store in the app — you receive either a QR code by email or a pair of manual credentials: an SM-DP+ address and an activation code. The QR code is a one-time credential; do not share it publicly, and do not scan it until you are ready to complete the setup in full.
Step-by-Step: How to Activate an eSIM on iPhone (iOS 17 and iOS 18)
Step 1 — Open Settings and tap Cellular
Open the Settings app on your iPhone and scroll down to Cellular (labelled Mobile Data in some regions, including the United Kingdom and Australia). This is the central hub for all SIM and eSIM management on your device. You will see your existing physical SIM listed here, along with any previously installed eSIM profiles.
Step 2 — Tap "Add eSIM"
Scroll to the bottom of the Cellular screen and tap Add eSIM. On iOS 18, you may see the option labelled Add Cellular Plan instead — both lead to the same screen. A setup sheet will appear with three options: Use QR Code, Enter Details Manually, and (on supported carriers) Transfer from Another iPhone. For a travel eSIM purchased through an app, you will almost always use the QR code method.
Step 3 — Scan the QR code
Tap Use QR Code and your iPhone's camera will open in a focused scanning mode. Hold the camera over your eSIM provider's QR code and keep it steady until the code is detected. If the QR code is on the same iPhone screen you are using to scan (for example, in an email on the same device), tap Enter Details Manually instead, then copy and paste the SM-DP+ address and activation code from the email into the corresponding fields.
Step 4 — Confirm and download the plan
After a successful scan, a confirmation screen appears showing the carrier name and plan details. Tap Add Cellular Plan to begin the download. Your iPhone will connect to the carrier's servers over Wi-Fi and download the eSIM profile — this typically takes between fifteen seconds and two minutes. Keep the screen on and do not close Settings during this step.
Step 5 — Label your new line
Once the download completes, iOS prompts you to give the new line a label. Default options include Primary, Secondary, Business, and Personal; you can also type a custom name such as "Singapore Trip" or "Japan Data". A descriptive label makes it much easier to identify the right line when switching between plans on a longer trip.
Step 6 — Set your default lines
iOS will ask which line to use for Default Voice Line, Default Data, and iMessage & FaceTime. For a travel eSIM used purely for mobile data abroad, set Default Data to the new eSIM line and leave your home SIM as the default voice line so calls and SMS still come through normally. Tap Done and your eSIM is active.
Discover Flights With Traveloka
Sun, 11 Oct 2026

VietJet Air
Ho Chi Minh City (SGN) to Singapore (SIN)
Start from 1.298.021 VND
Thu, 15 Oct 2026

Scoot
Hanoi (HAN) to Singapore (SIN)
Start from 1.986.124 VND
Thu, 1 Oct 2026

AirAsia Berhad (Malaysia)
Da Nang (DAD) to Singapore (SIN)
Start from 1.715.411 VND
How to Switch Between Your SIM and eSIM While Travelling
Once you have both a physical SIM and an eSIM active, switching which line handles your mobile data takes only a few seconds. Go to Settings → Cellular and tap Cellular Data at the top of the screen. A list of your active lines appears — tap the one you want to use for data and the switch is immediate. Remember to turn off Data Roaming on your home SIM line to make certain no accidental data charges appear on your bill.
If you are crossing into a different country mid-trip and your travel eSIM does not cover that destination, you can add a second eSIM profile for the new country without removing the first one. iPhone 13 and newer models store multiple eSIM profiles, though only two can be active simultaneously. Booking hotels and activities in advance is a great time to also purchase destination-specific eSIM plans — everything in one session before you travel.
Troubleshooting Common eSIM Activation Issues
eSIM stuck on "Activating"
If the status sits on "Activating" for more than five minutes, toggle Airplane Mode on and off, then check your Wi-Fi connection. A weak or interrupted signal is the most common cause of a stalled activation. Restarting your iPhone after toggling Airplane Mode often resolves the issue. If the problem persists, go to Settings → General → Software Update and install any available iOS update.
"Activation failed" or "QR code already used" error
Travel eSIM QR codes are single-use digital credentials. If you see an "Activation failed" message or a warning that the code has already been used, do not delete the eSIM profile from your device — deleting it may make re-installation impossible without a new code from your provider. Instead, contact your eSIM provider's support team and request a replacement QR code.
eSIM activates but shows no signal
A successfully installed eSIM that shows no bars usually means one of two things: Data Roaming is switched off, or the plan has not yet reached its start date. Navigate to Settings → Cellular → [your eSIM line] → Data Roaming and ensure it is toggled on. Also check that the line is turned on under Settings → Cellular → [your eSIM line].
iPhone is carrier-locked
If you see "SIM Locked" or "Carrier Locked" under Settings → General → About, your device cannot activate a third-party eSIM until the lock is removed. Contact your home carrier — most will unlock the device at no charge once the handset has been fully paid off or the minimum contract period has elapsed. Unlocking is typically processed within one to three business days.
An airport transfer booked in advance pairs perfectly with a pre-activated travel eSIM — you step out of arrivals with data already running and your ride already confirmed. For flexibility across your destination, car rental options are available to browse alongside your eSIM purchase.
Plan Your Trip with Southeast Asia's Leading Travel Platform
Southeast Asia's leading travel platform, trusted by over 100 million users, Traveloka promotions bring together flights, hotels, activities, car rental, travel insurance, and eSIM in one place — so every element of a trip can be planned, booked, and managed without switching between apps or tabs.
Traveloka eSIM is a standout feature for international travellers. Browse travel eSIM plans covering destinations across Asia and beyond directly inside the app, purchase a plan before you depart, and receive your QR code instantly — ready to scan using the steps in this guide. Multi-country plans covering Singapore, Malaysia, Indonesia, Thailand, Japan, and more are available, making it easy to stay connected across a regional itinerary without buying a separate SIM for each stop. Download the Traveloka app, search for a travel eSIM for your next destination, and set up your iPhone's connection before you even pack your bag.
In This Article
Explore the Best of World

World
Recommended Articles

10 Best Things to Do in Melbourne with Kids

7 Famous Landmarks in the World You Need to Visit

Resorts World Sentosa: Complete Guide to Singapore's Top Attractions

Watersports in Nusa Dua and Tanjung Benoa: The 2026 Price Guide

Osaka in Spring: Cherry Blossoms, Warm Walks, and Perfect Weather for Exploring

Singapore Night Festival 2026: Dates, Theme, and What to See


